FiveM · txAdmin · Database
Complete guide: FiveM hosting + database setup
This guide walks you through the entire process from first-time FiveM server launch, logging into txAdmin, choosing a framework (ESX/QBCore), creating and connecting a MySQL database, to successfully starting your server.
Steps overview
- 1Add a second port via Create Allocation (Network tab) and set it as TXADMIN PORT in the Startup tab
- 2Start the server and find the txAdmin PIN + URL in the console
- 3Log into txAdmin using your Cfx.re account
- 4Complete the Setup Wizard (server name, deploy type, template)
- 5Create a database in the game panel and copy credentials
- 6Get a license key from portal.cfx.re
- 7Fill in the Recipe Deployer (key + DB credentials) and run deployment
- 8Verify server.cfg and set the endpoint
- 9Start the server and confirm database connection in the console
1Server ports – Network tab
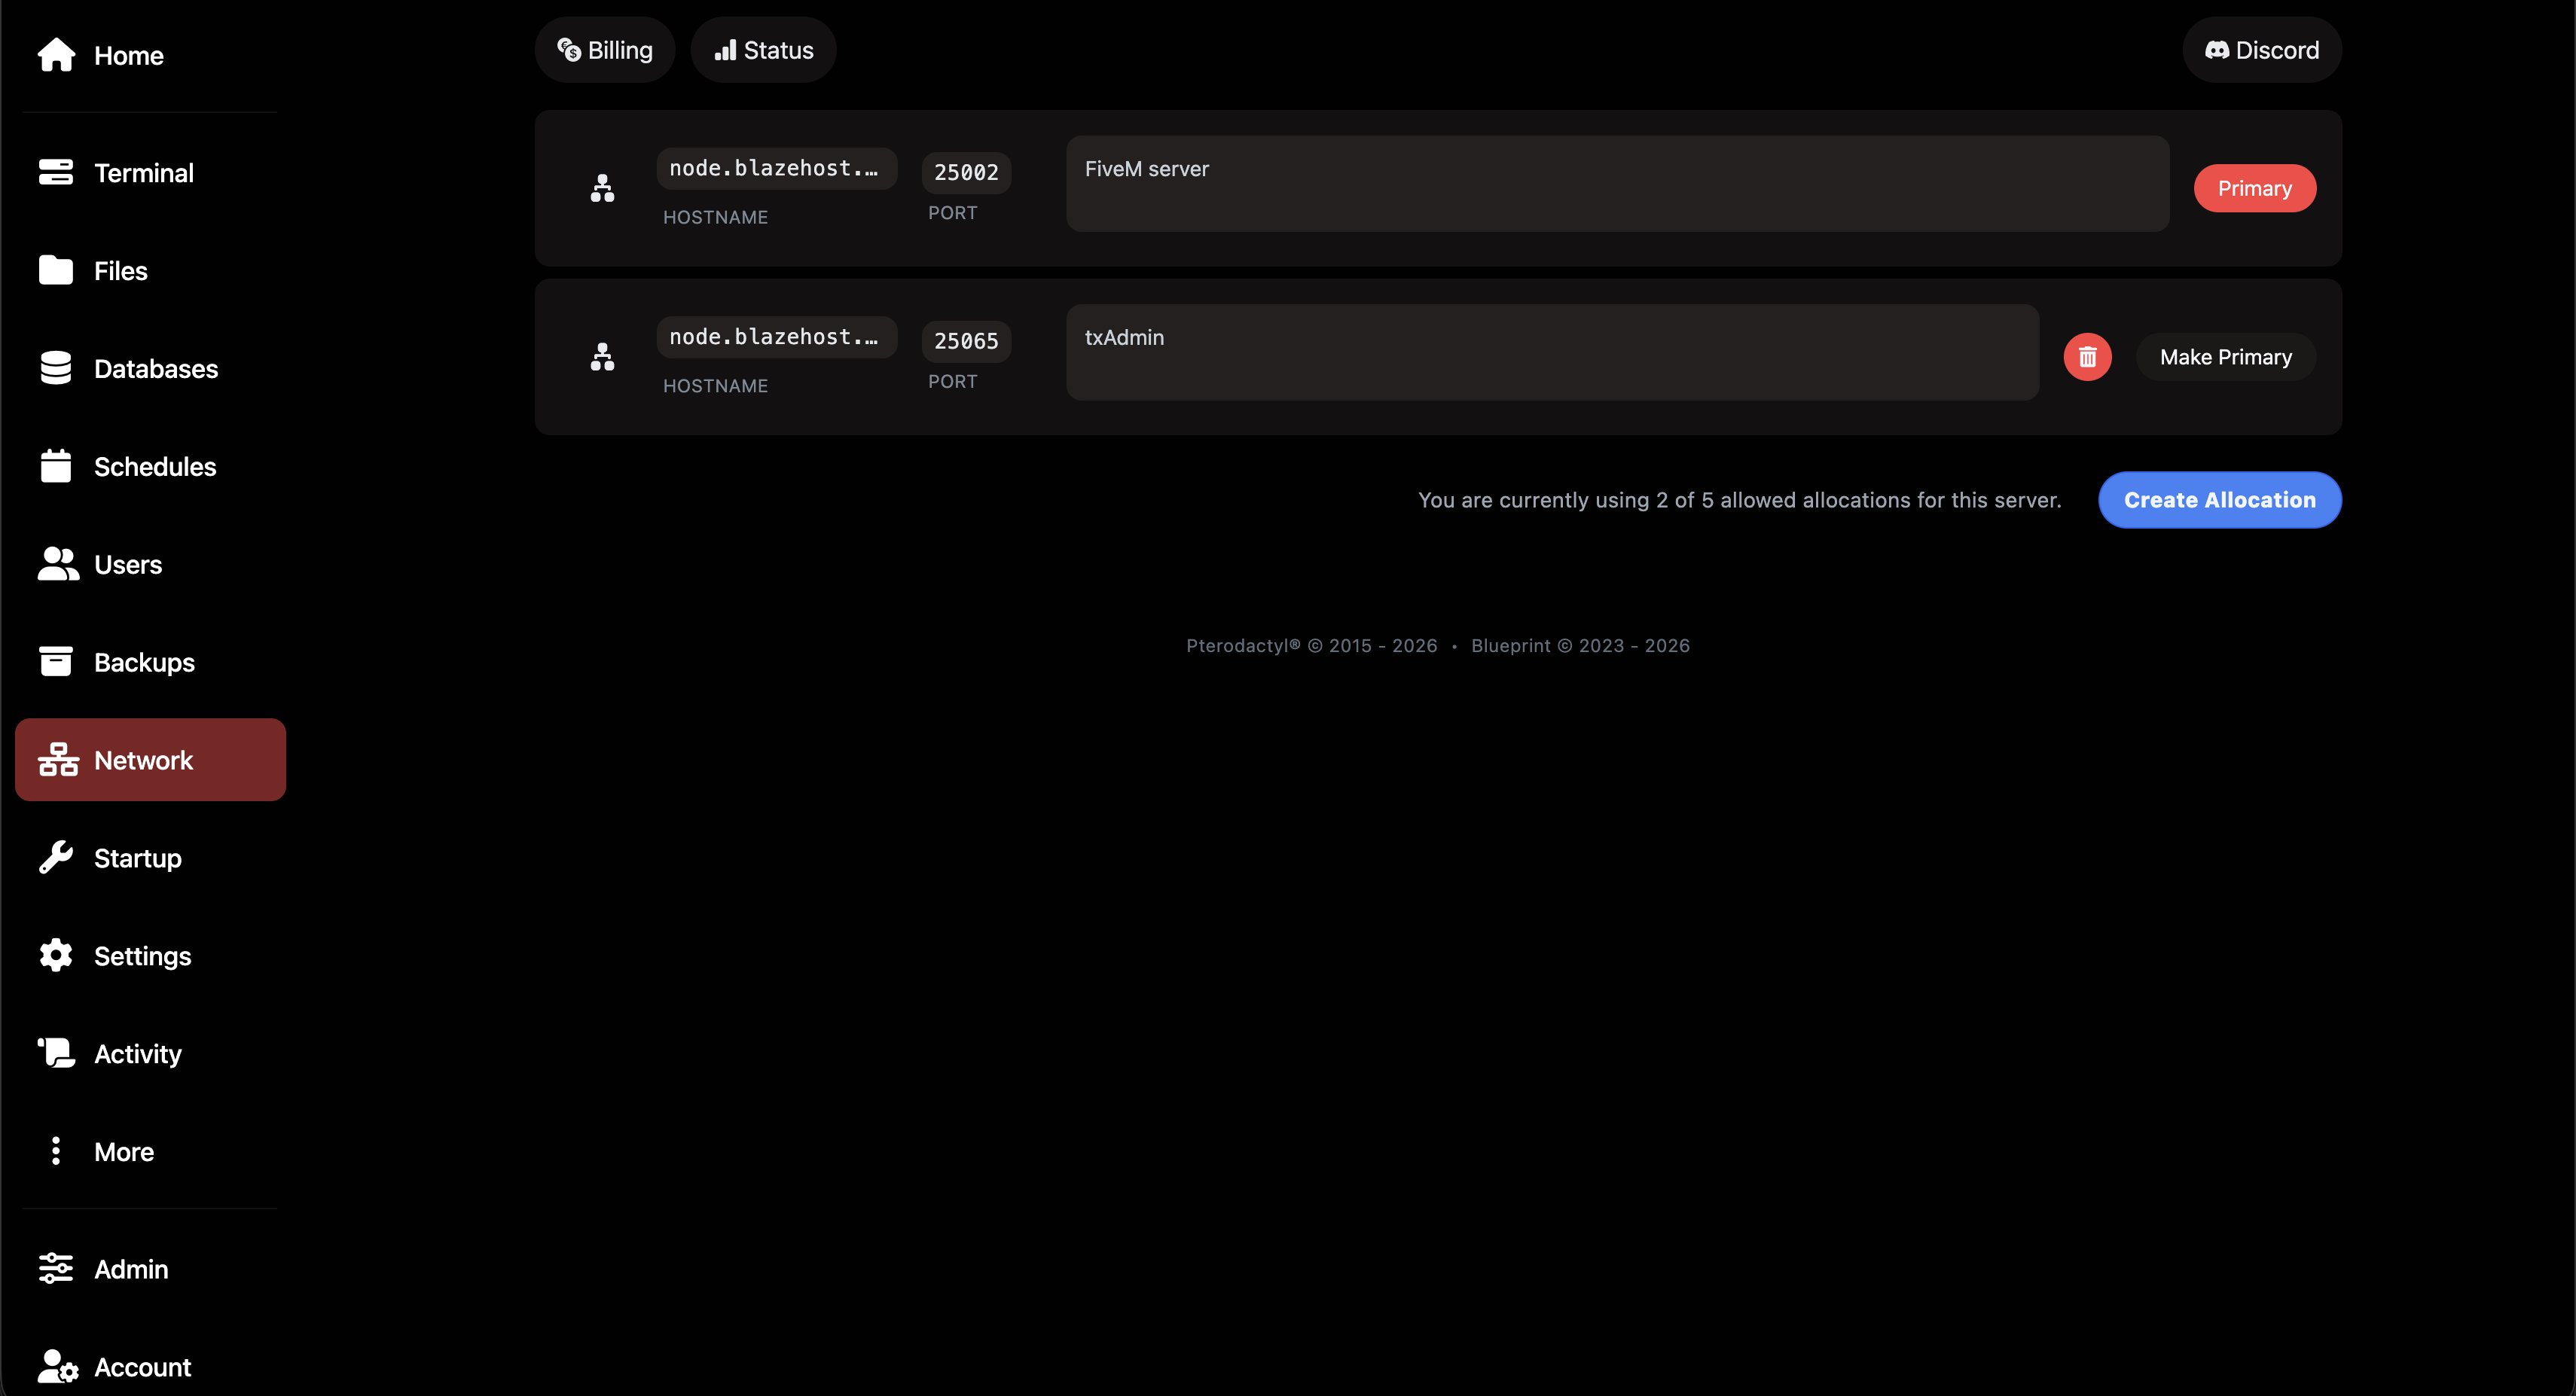
After logging into the game panel at panel.blazehost.cz and opening your FiveM server, go to the Network tab in the left menu. By default only one port is allocated (the primary FiveM server port). For txAdmin you need a second port – add it by clicking Create Allocation.
- FiveM server – primary port players connect to – marked as Primary (e.g.
node.blazehost.cz:25002) - txAdmin – second port you manually add via Create Allocation (e.g.
node.blazehost.cz:25065)
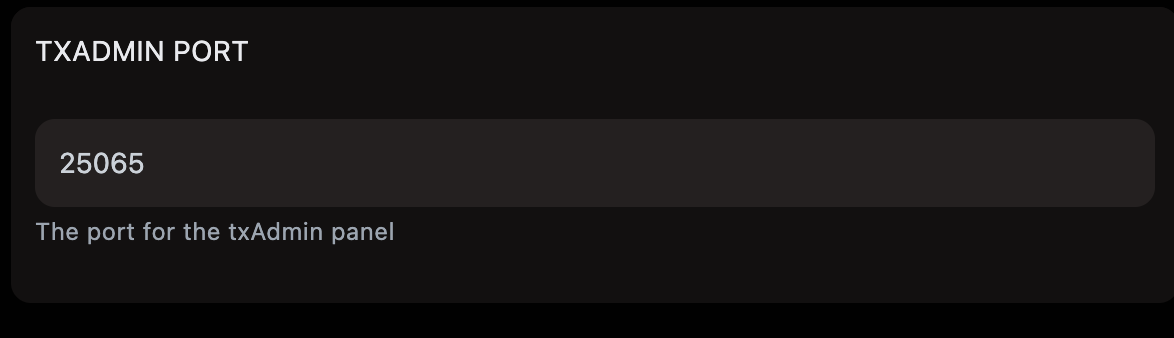
Setting TXADMIN PORT in the Startup tab
Go to the Startup tab in the left menu. Find the TXADMIN PORT field – the default value is 40120. Change it to the port number you just allocated in the Network tab (25065 in the example). The value saves automatically when you leave the field.
2Starting the server and finding the PIN
On the server's main page in the panel, click the Start button (green arrow). The server will begin initializing and logs will appear in the Console (Terminal) tab.
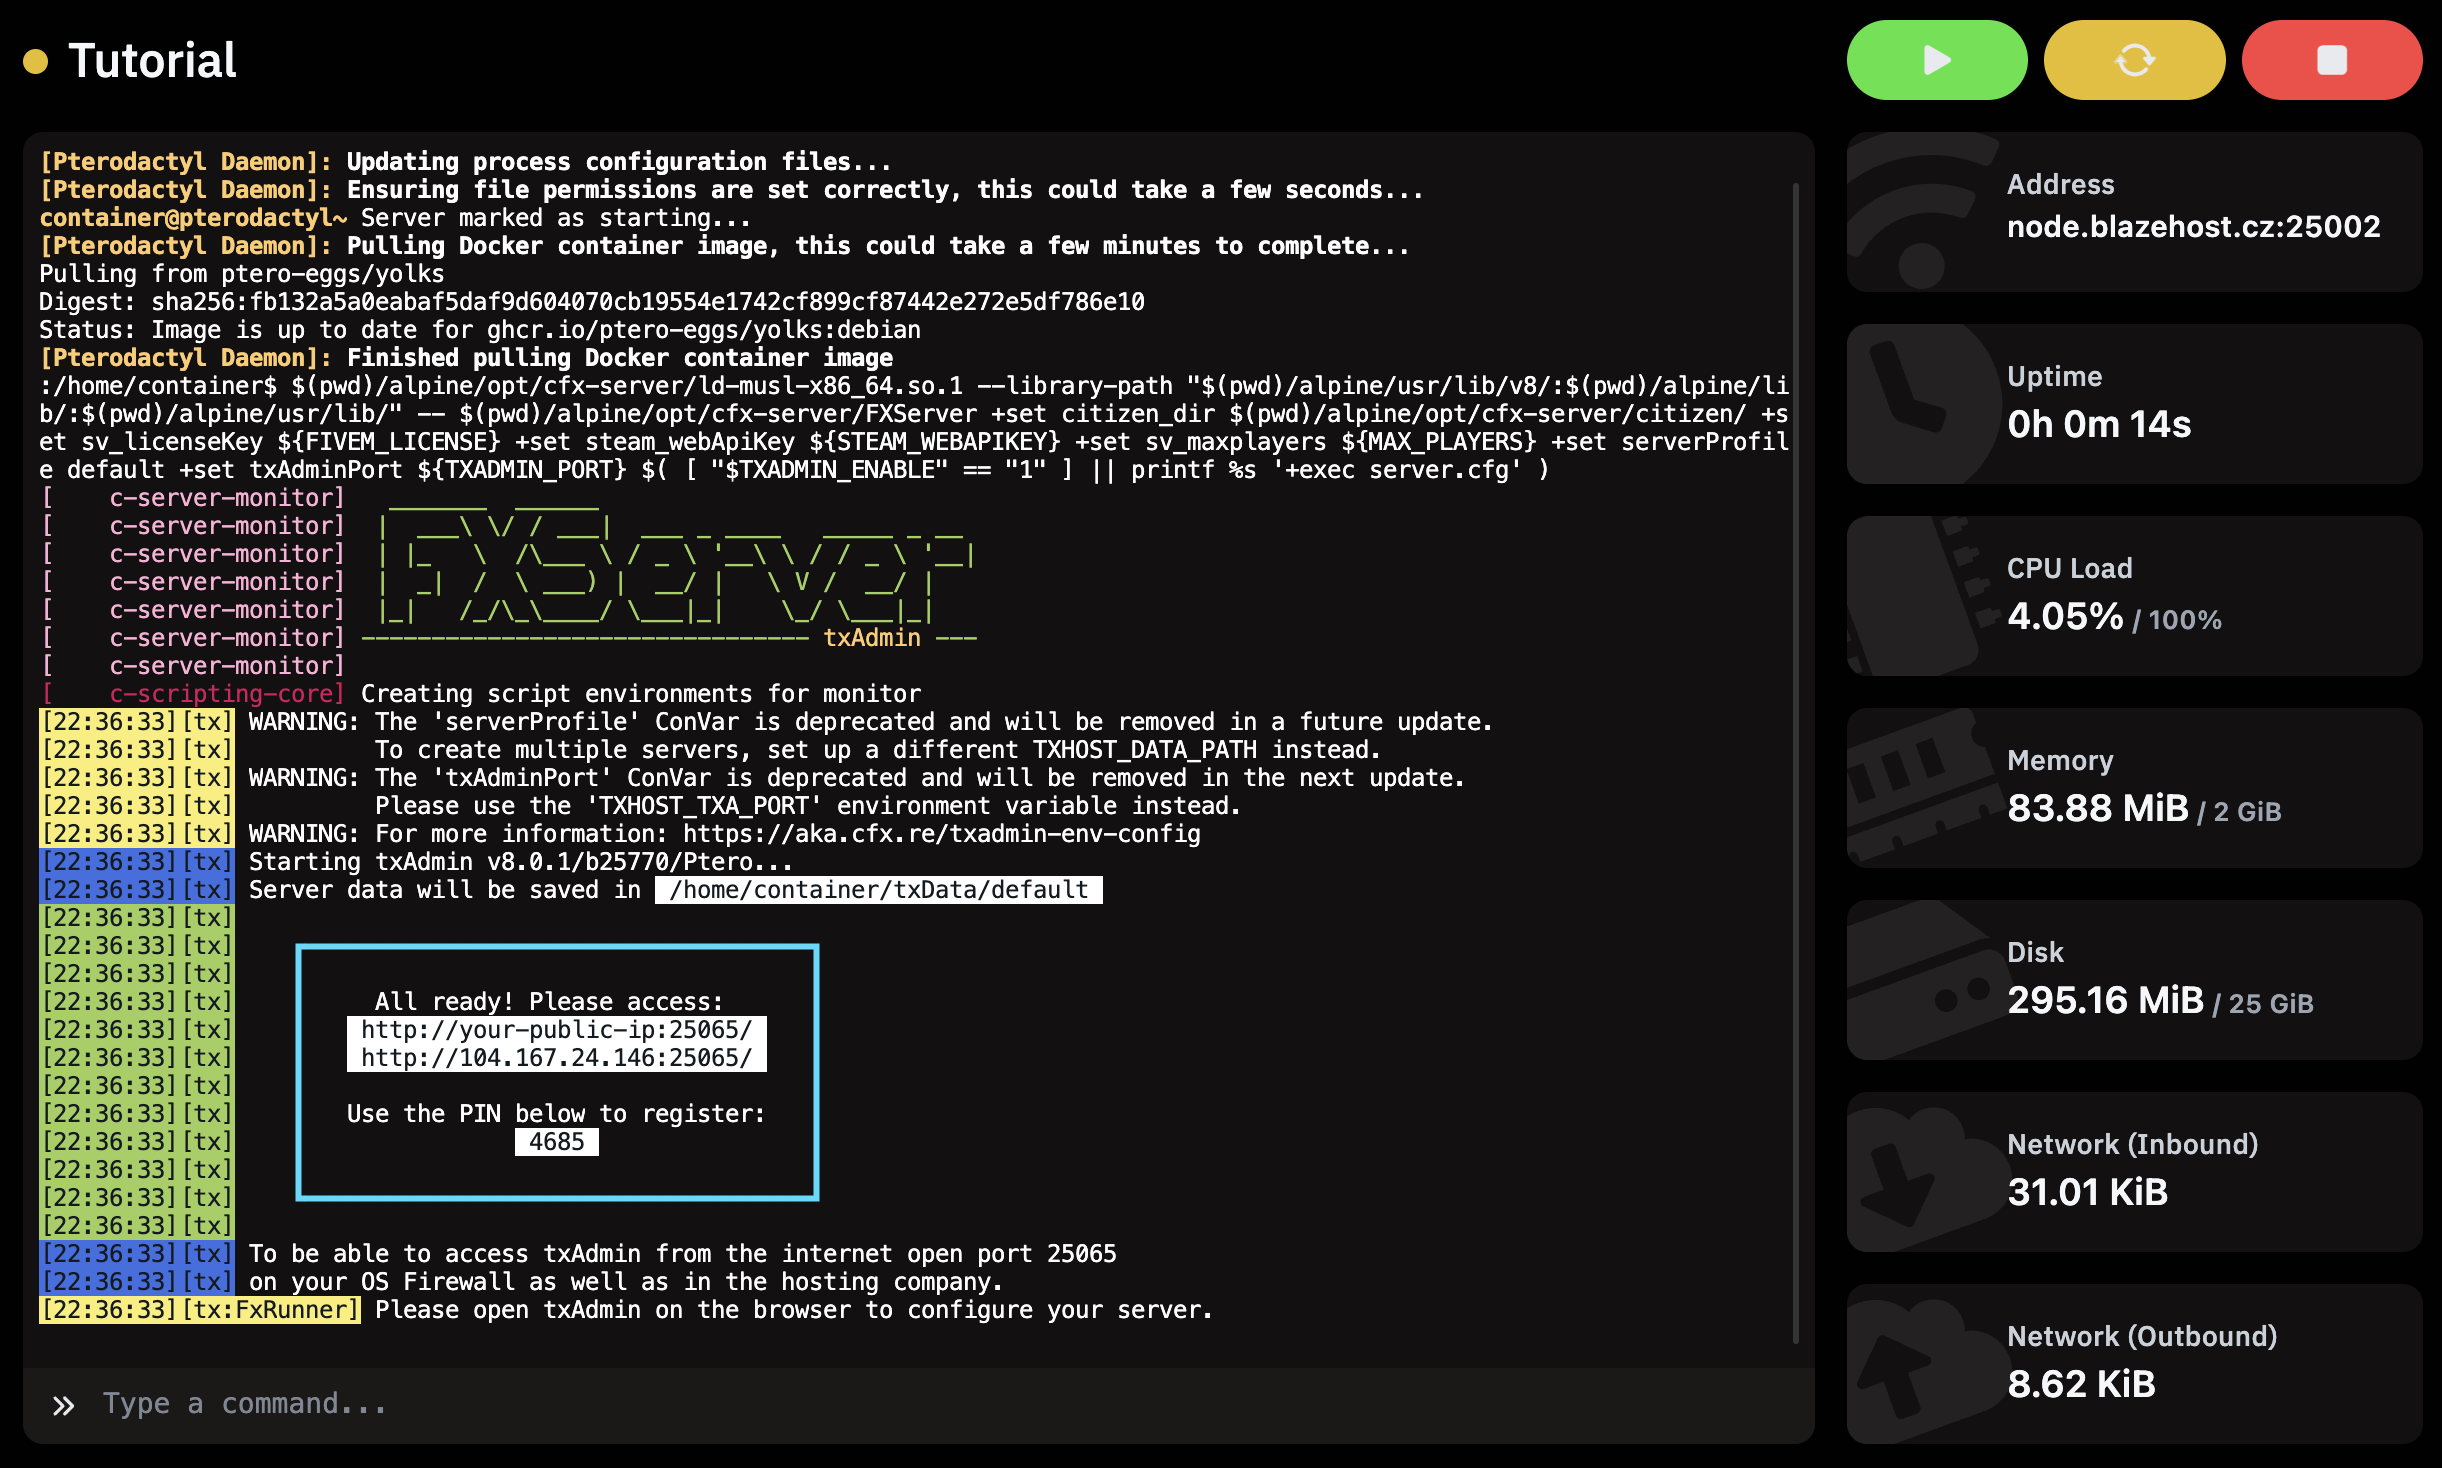
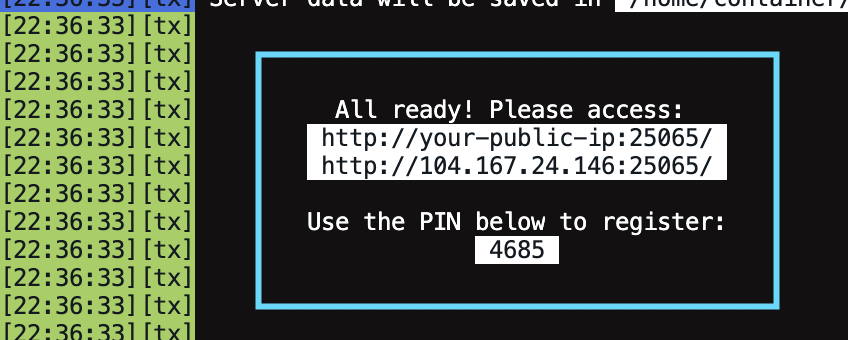
Wait about 30–60 seconds. Once txAdmin is ready, the console will show a box containing:
- txAdmin address (usually
http://<ip>:25065/) - 4-digit PIN code for first registration
3Logging into txAdmin
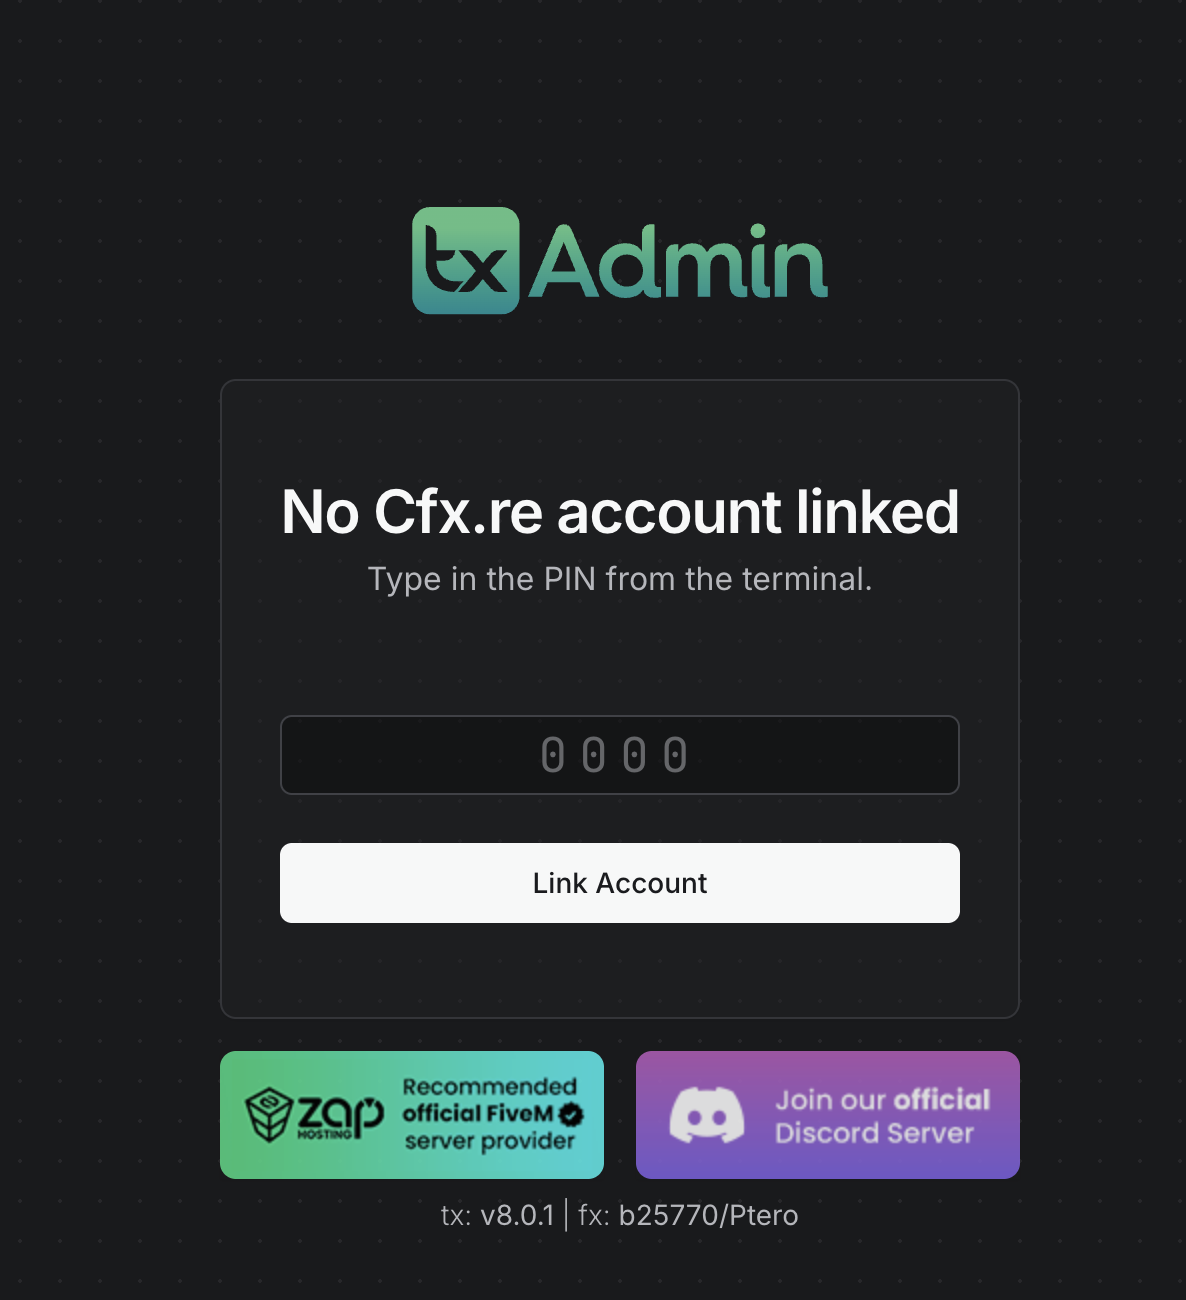
Open the txAdmin URL in your browser in the format http://node.blazehost.cz:TXADMIN_PORT/. A login page will appear asking for the PIN code. Enter the PIN shown in the console and click Link Account.
Linking your Cfx.re account
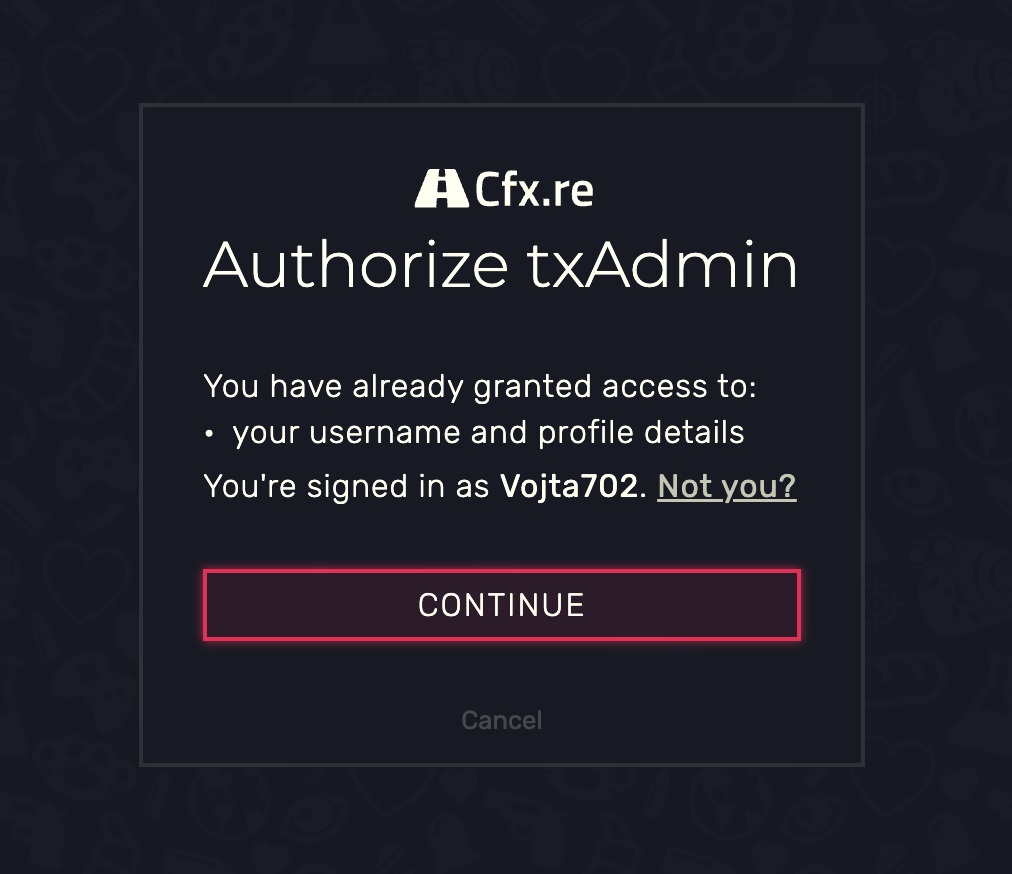
txAdmin will redirect you to the Cfx.re authorization page. Click Continue to confirm access.
Admin registration
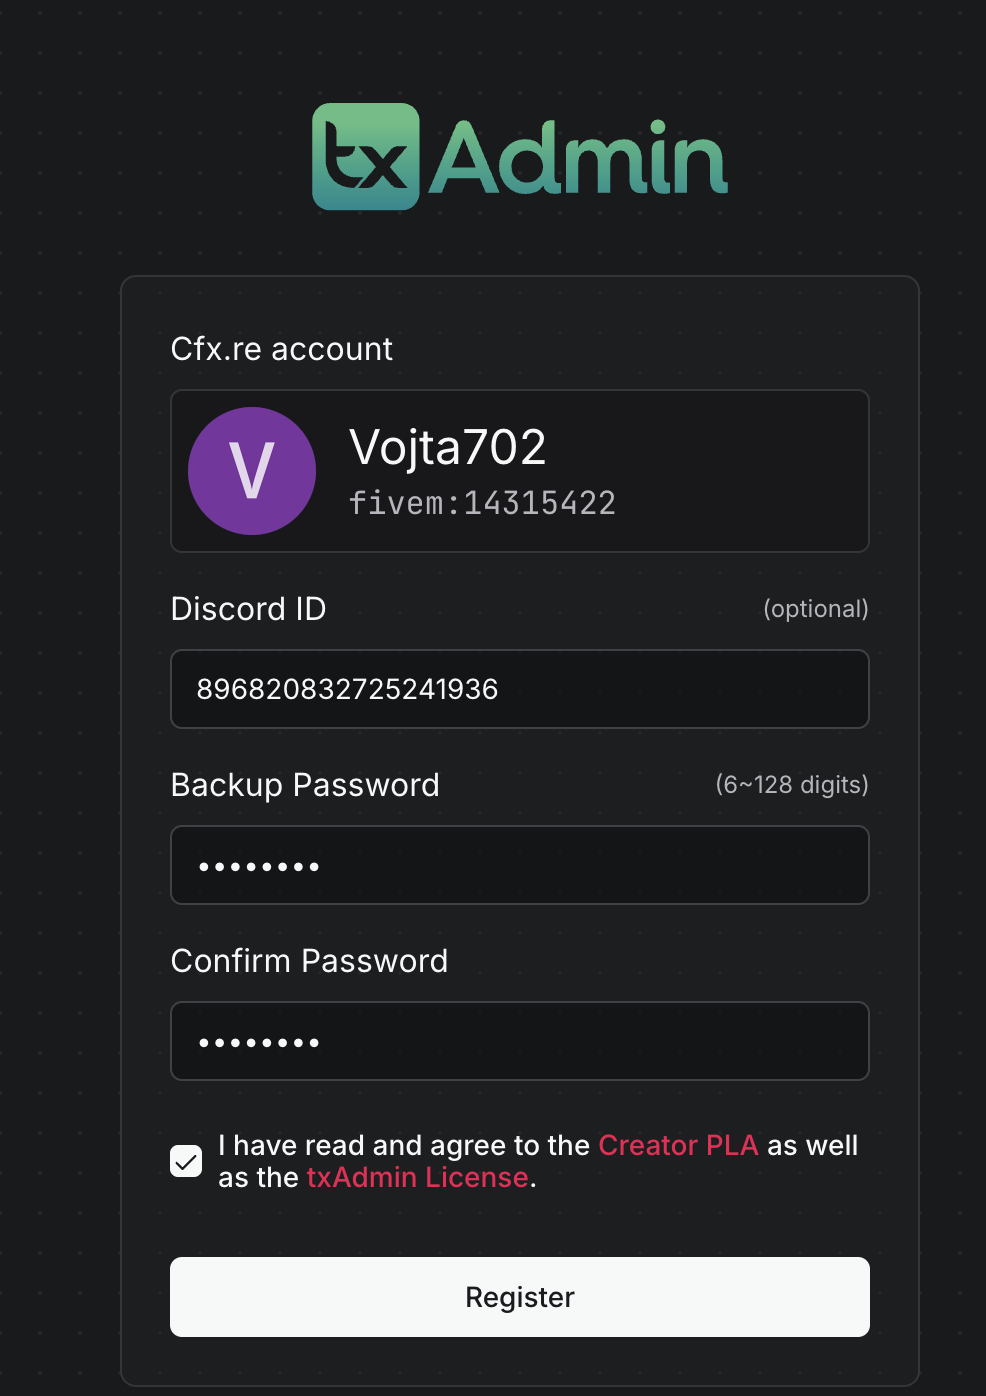
On the registration page your Cfx.re account is pre-filled. Set:
- Discord ID – optional, for Discord bot integration
- Backup Password – backup password (6–128 digits) used to log in if you lose Cfx.re access
Check the license agreement and click Register.
4Setup Wizard – initial configuration
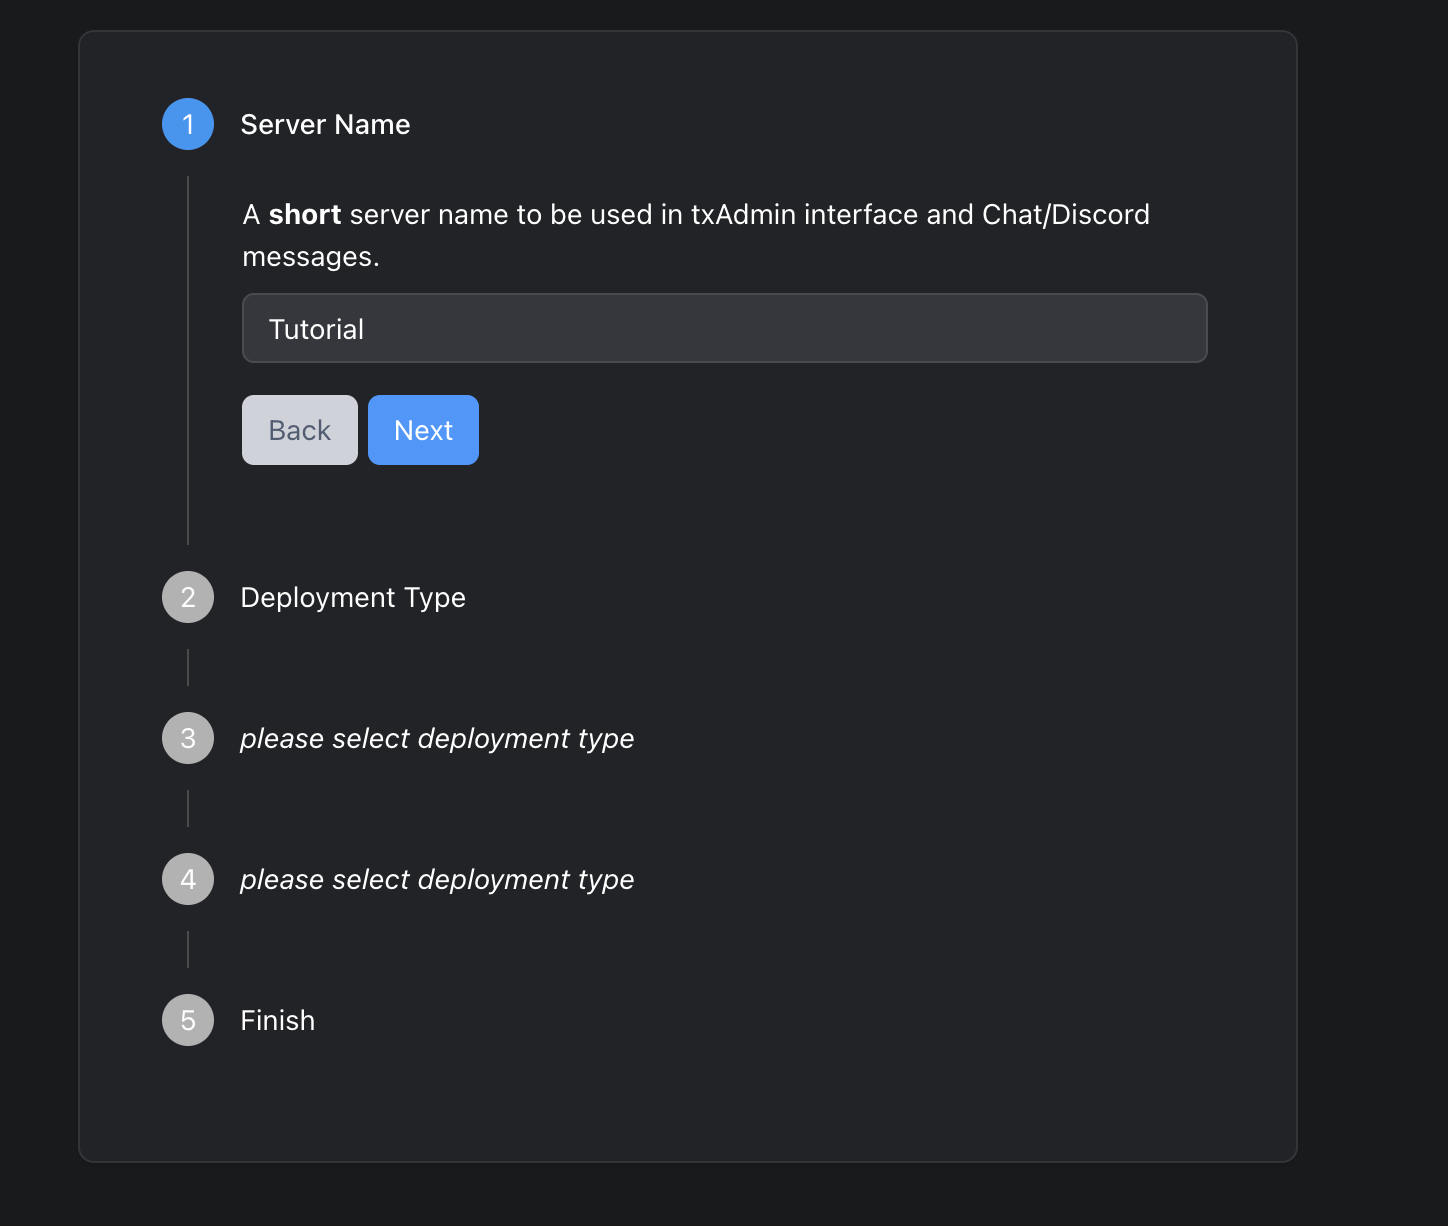
After registration txAdmin will automatically redirect you to the Setup Wizard. The wizard has 5 steps.
Step 1 – Server Name
Enter a short server name that will appear in the txAdmin interface and Discord messages. Click Next.
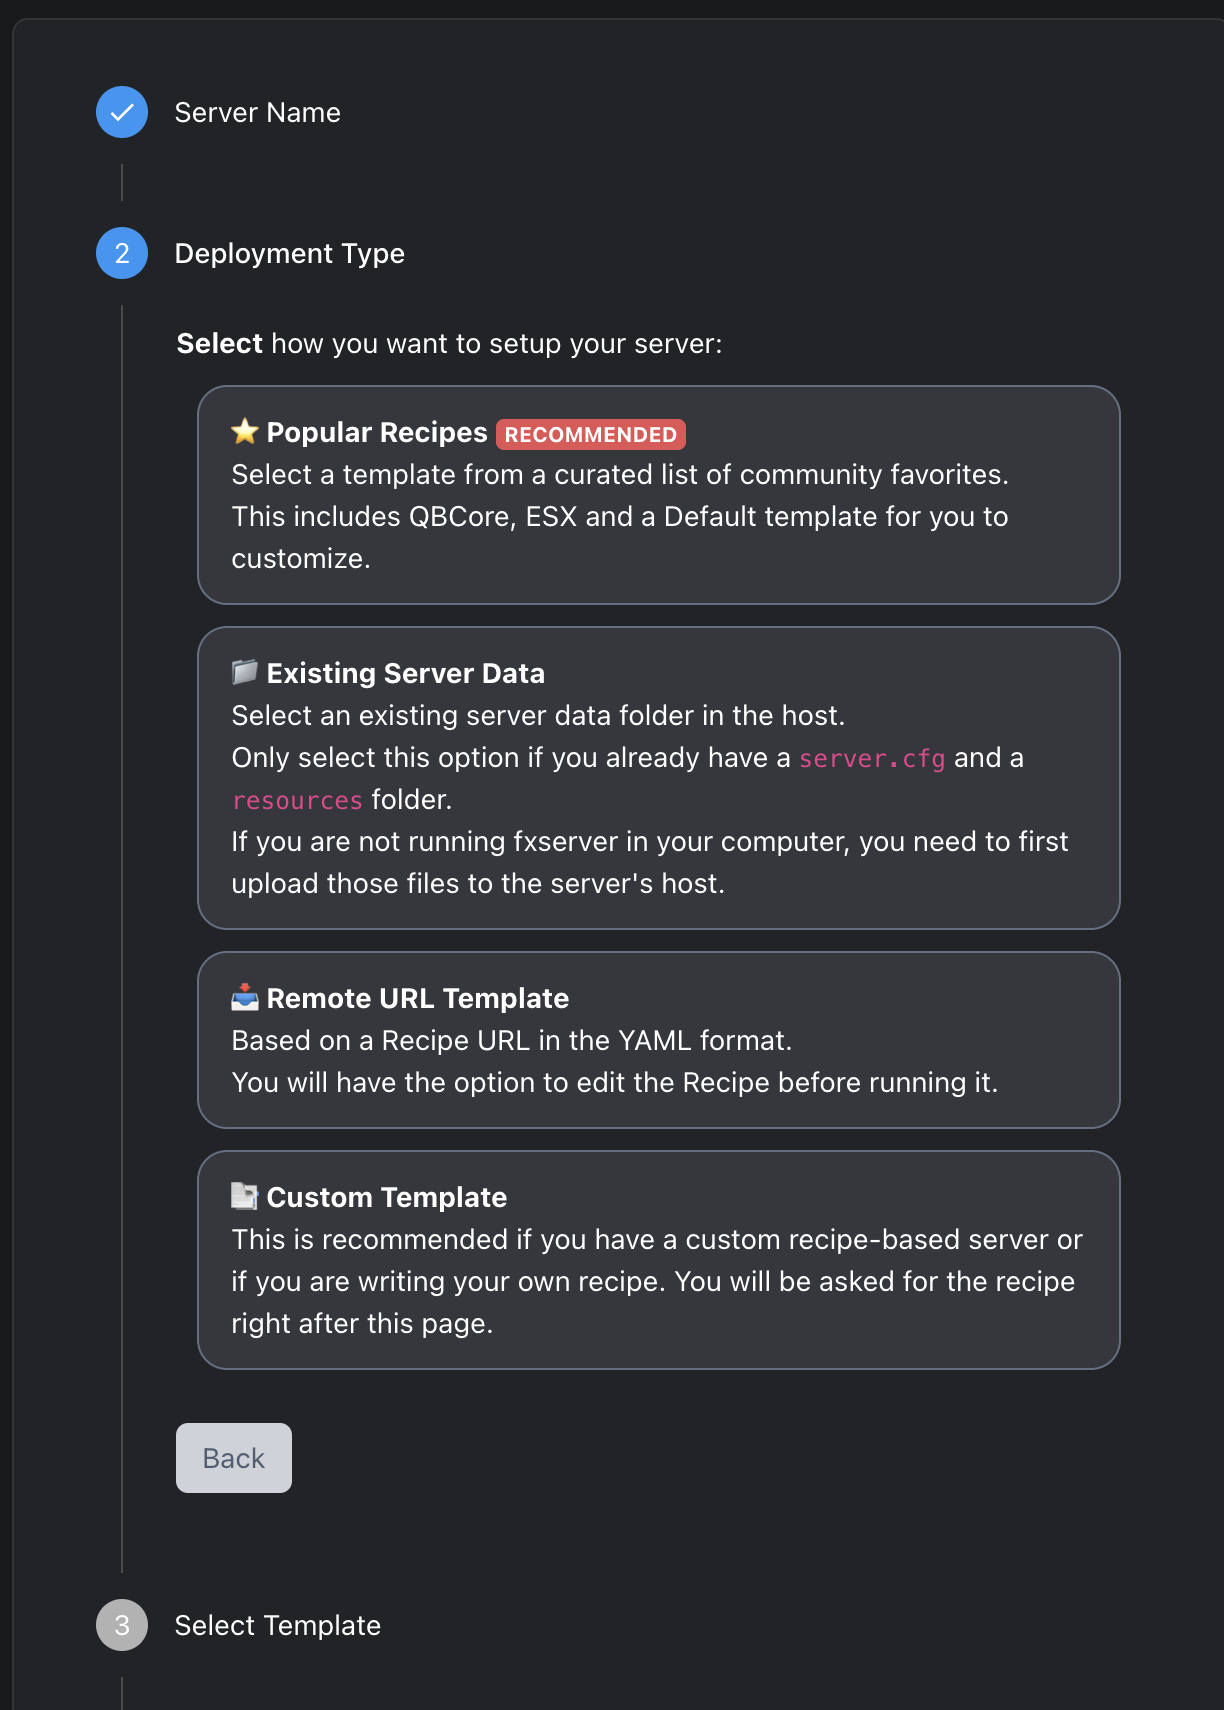
Step 2 – Deployment Type
Choose the deployment method. For a new server select Popular Recipes (recommended) – this option gives you ready-made framework templates.
Step 3 – Select Template
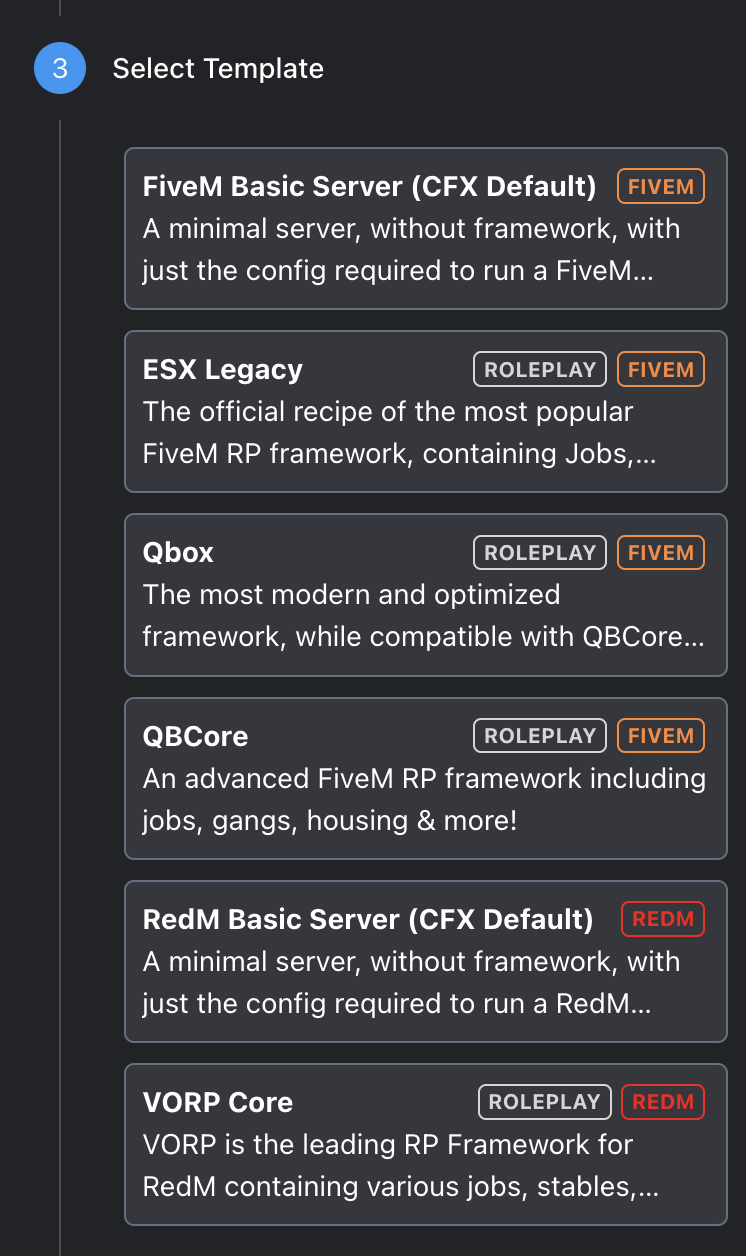
Choose the framework you want to build your server on:
- ESX Legacy – most popular RP framework, huge community and thousands of ready scripts
- Qbox / QBCore – modern alternative with clean architecture and active development
- FiveM Basic Server (CFX Default) – clean server without any framework, suitable for advanced users
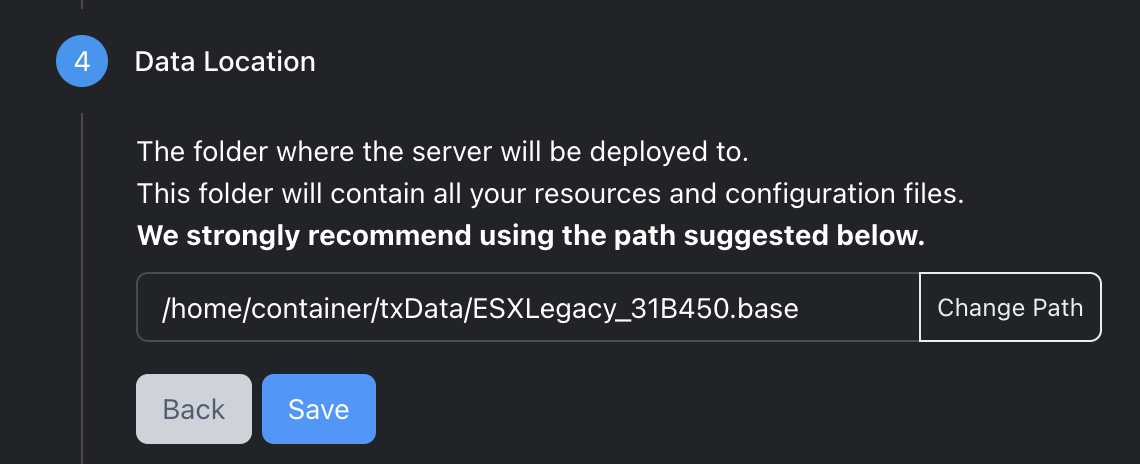
Step 4 – Data Location
txAdmin will suggest a path where server files will be stored. We recommend using the default path and just clicking Save.
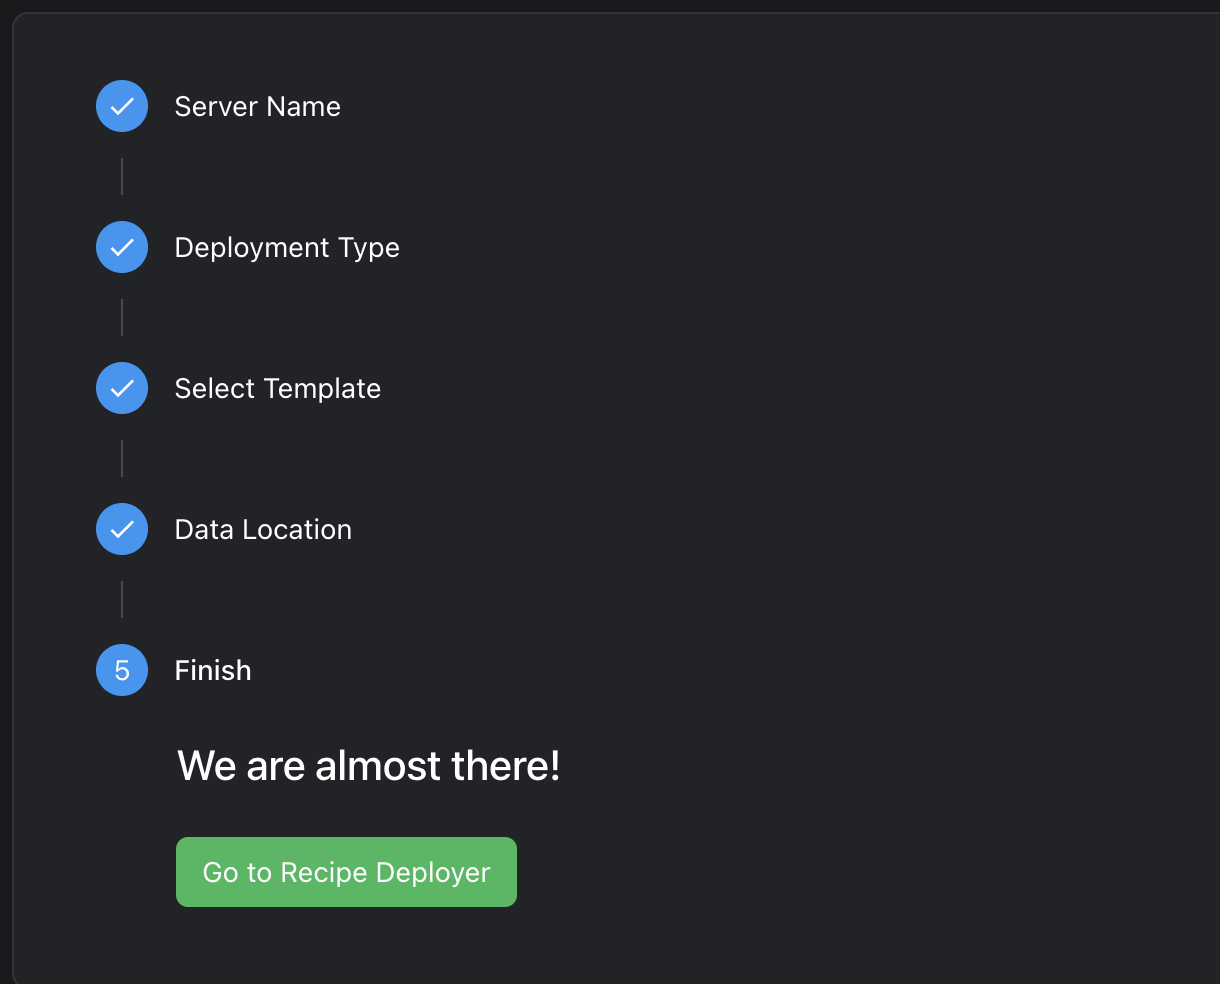
Step 5 – Finish
All steps are complete. Click the green Go to Recipe Deployer button to proceed to the actual deployment.
5Creating a database in the game panel
Before running the Recipe Deployer, create a database in the game panel. Go to the Databases tab in the left menu → click New Database.
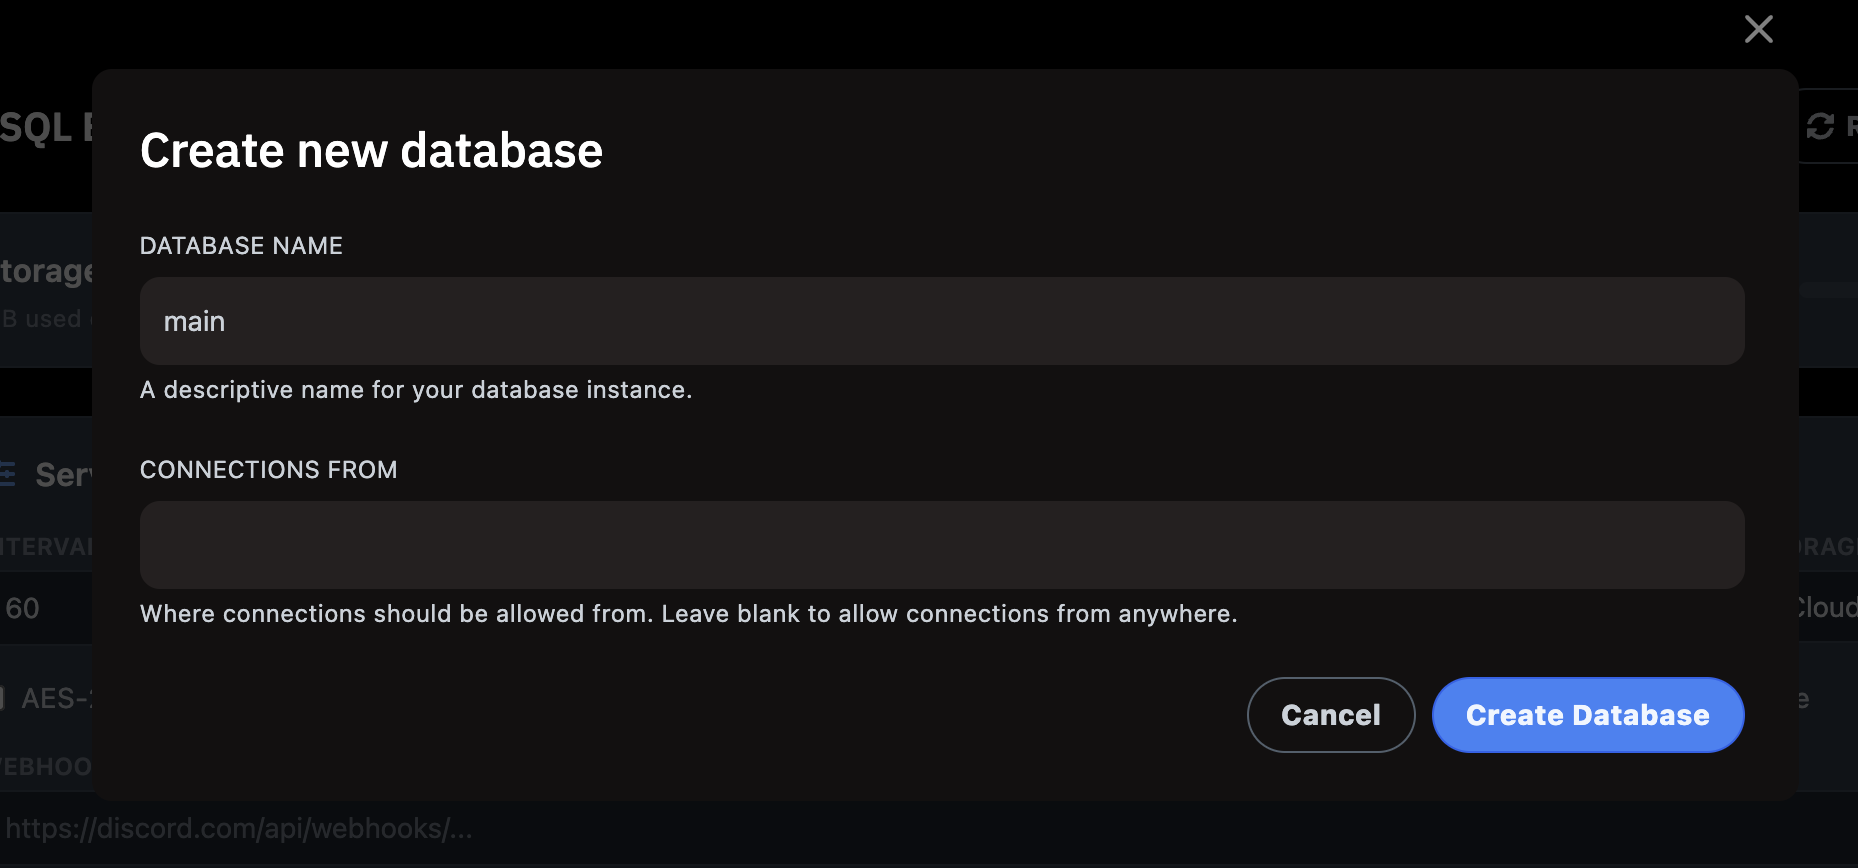
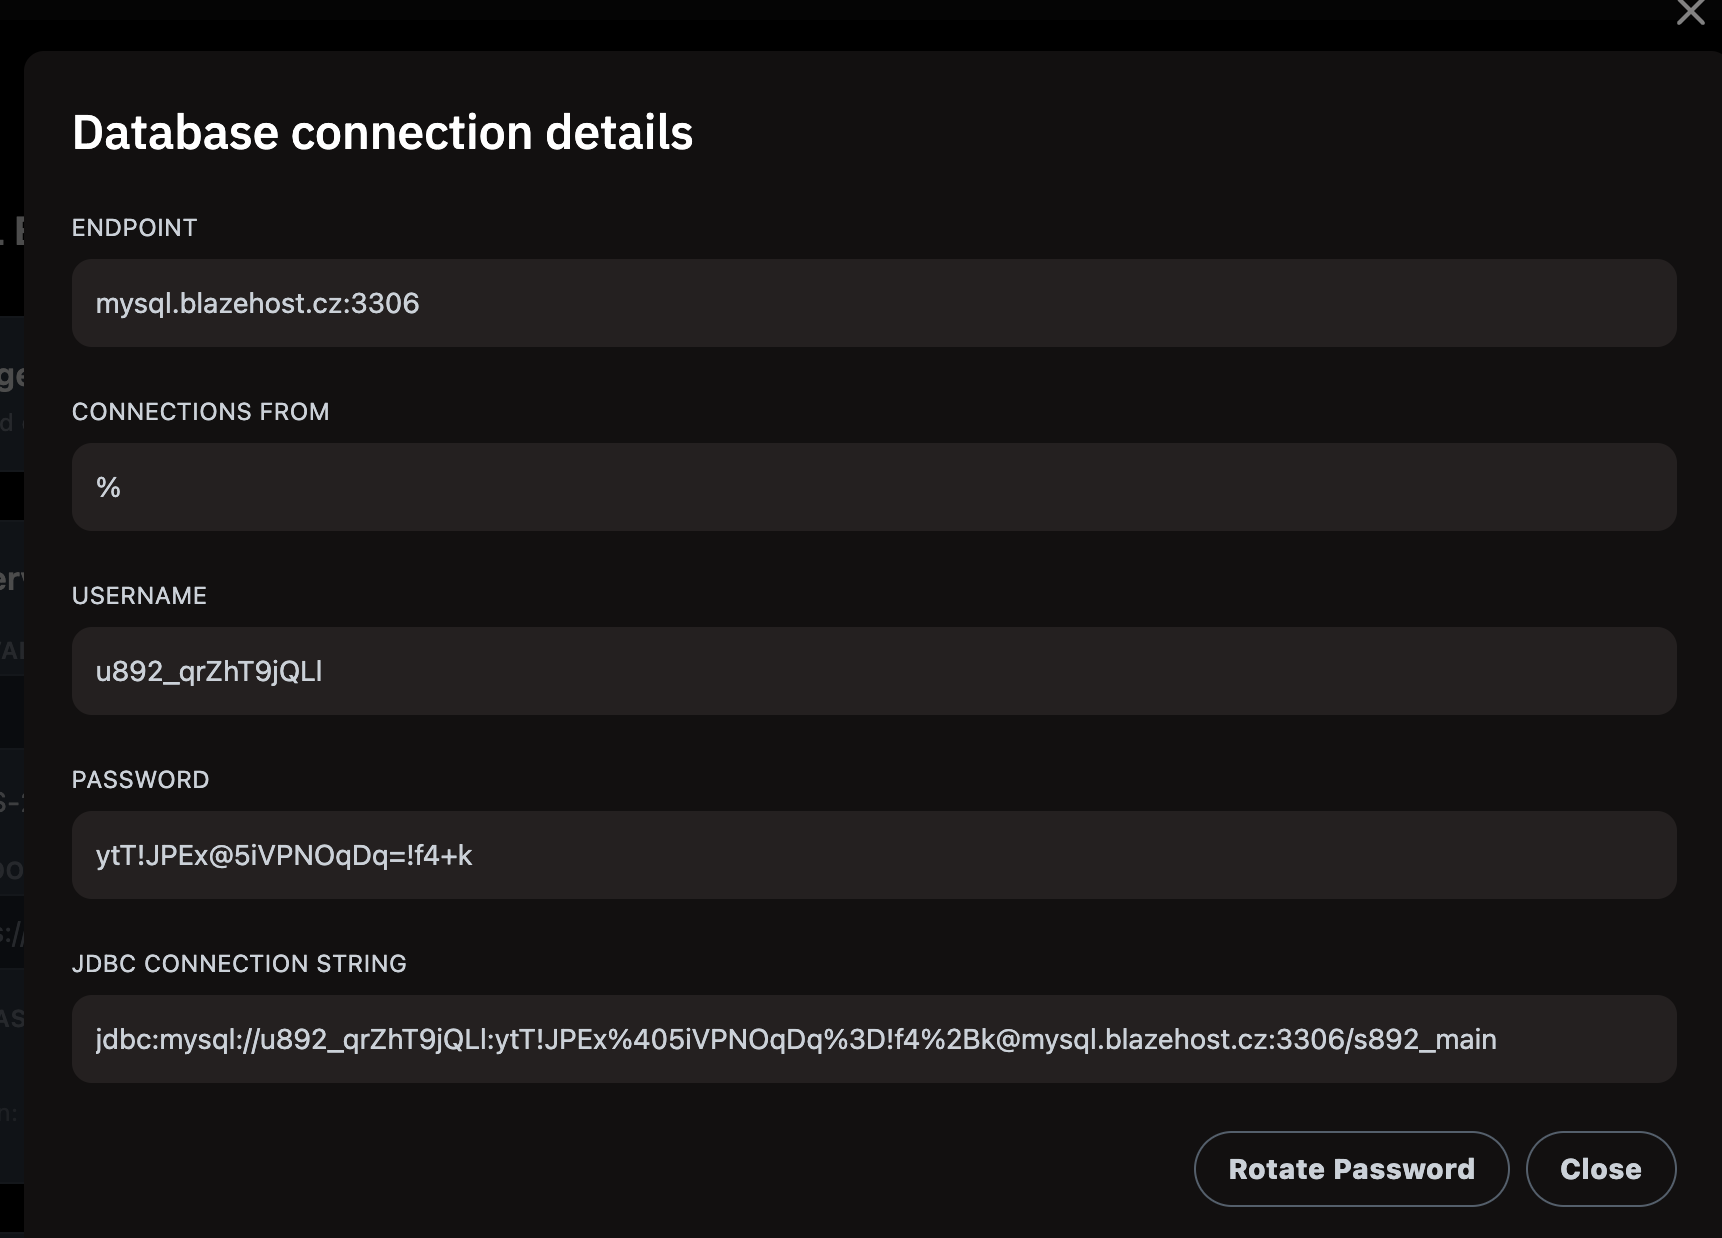
After creating, click the eye icon or details button. A modal will appear with the connection credentials:
- Endpoint:
mysql.blazehost.cz:3306 - Username: auto-generated username
- Password: auto-generated password
6License key from portal.cfx.re
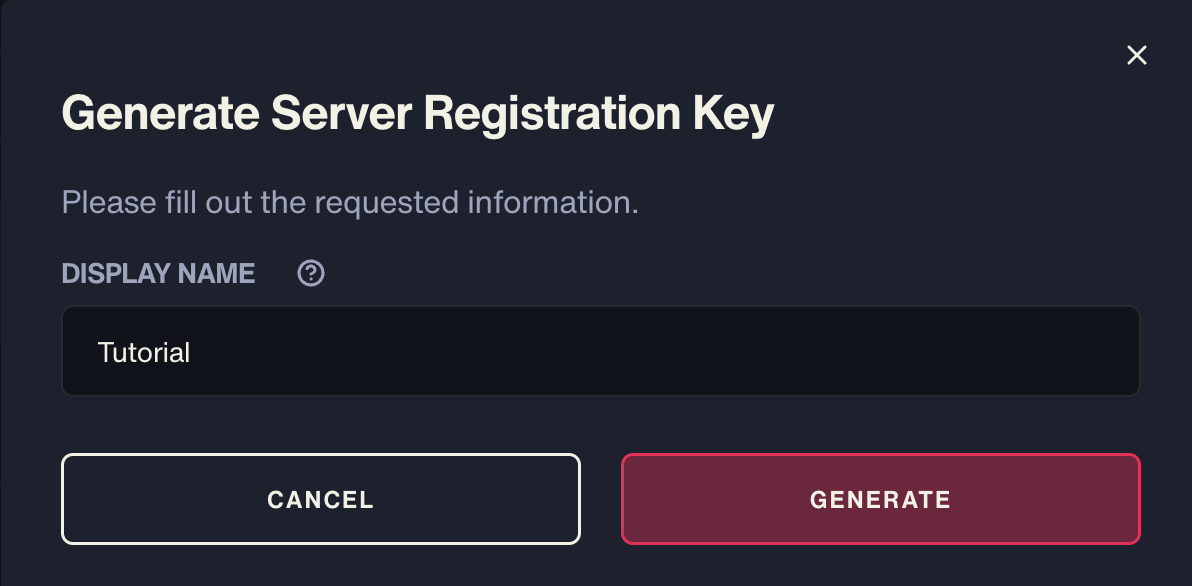
To run a FiveM server you need a free Server Registration Key. Keymaster has moved to a new address – go to portal.cfx.re and log in with your Cfx.re account.
- Click Generate
- Enter a Display Name (any name, e.g. Tutorial)
- Click Generate and copy the generated key
7Recipe Deployer – fill in and run
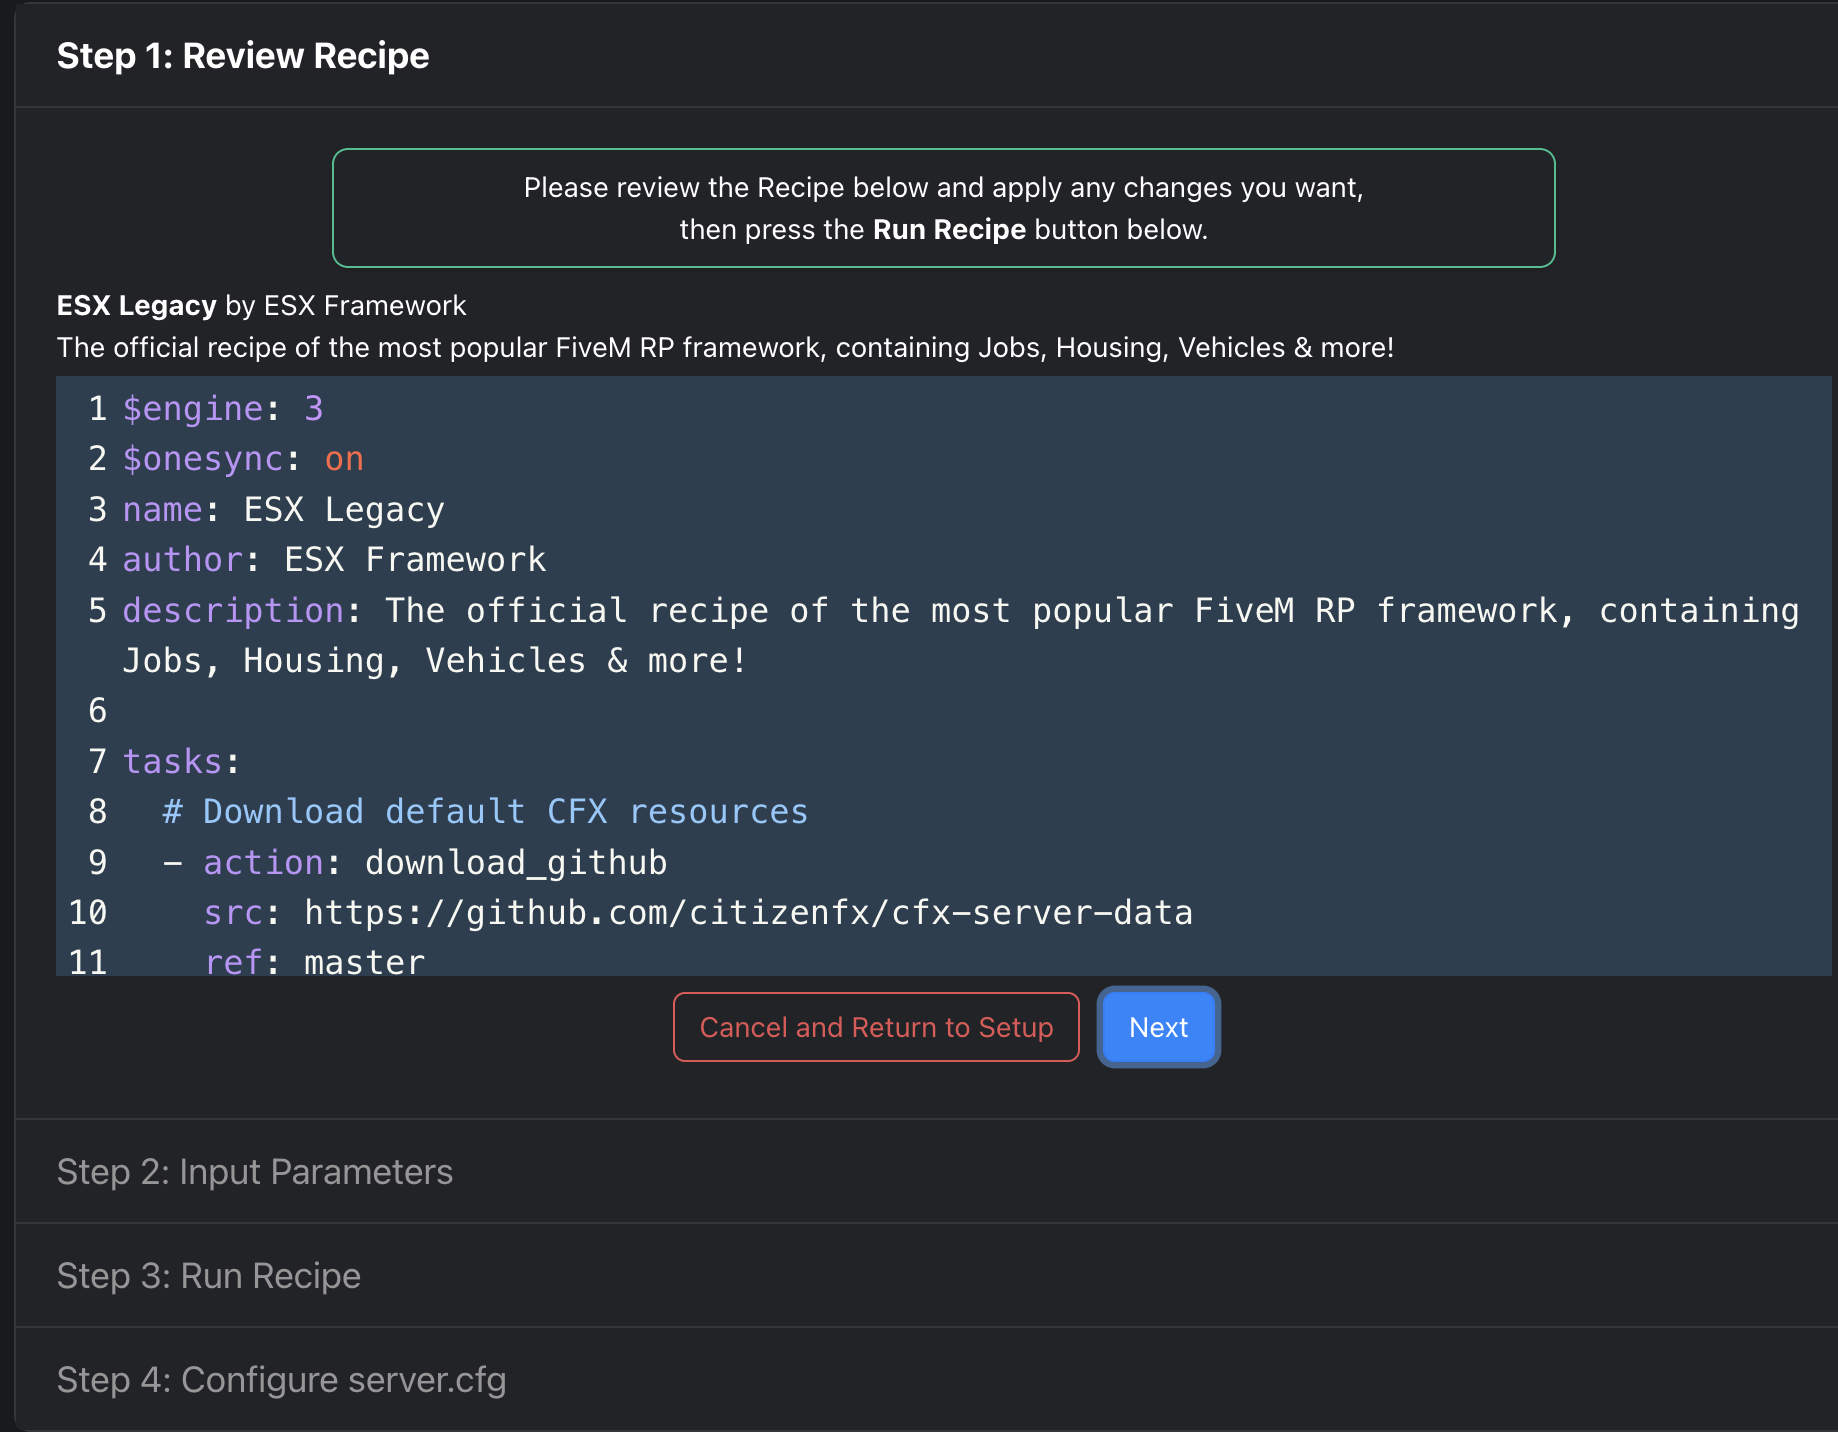
Step 1 – Review Recipe
The Recipe Deployer shows the YAML file of the selected template. You can review it – it contains all tasks that will be performed automatically (downloading files, DB setup…). Click Next.
Step 2 – Input Parameters (database + license key)
This is the most important part. Fill in the panel credentials and the license key from portal.cfx.re:
- Server Registration Key – key from portal.cfx.re
- Database Host –
mysql.blazehost.cz - Database Port –
3306 - Database Username – username from the panel (Databases tab)
- Database Password – password from the panel
- Database Name – database name (auto-filled)
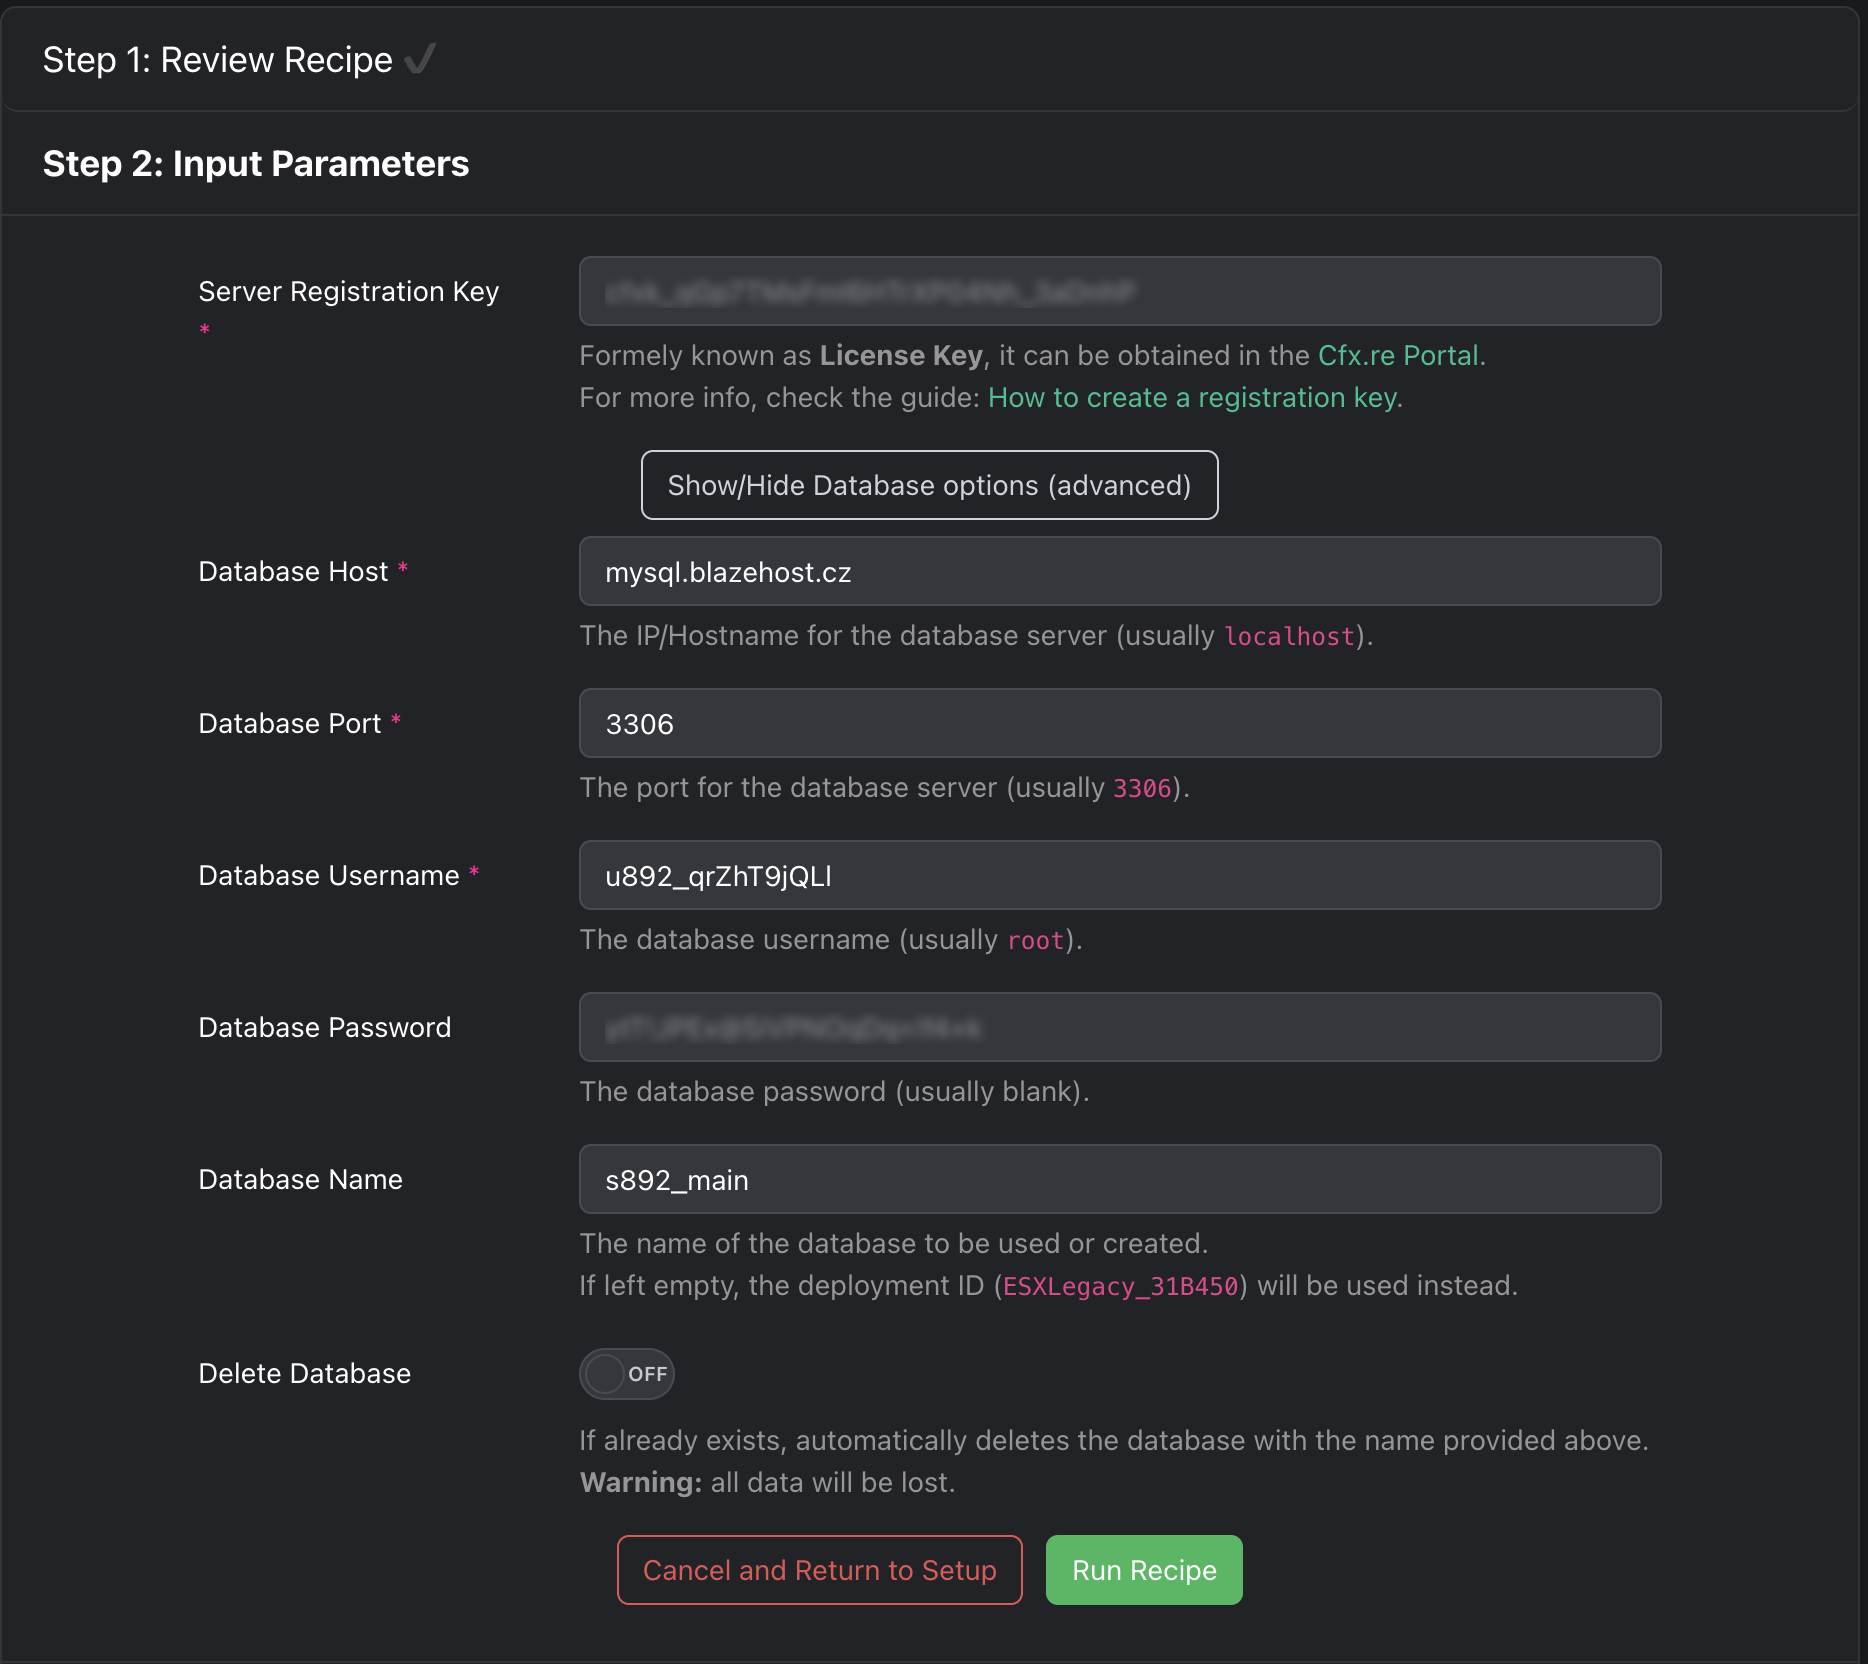
mysql.blazehost.cz as Database Host – not localhost or 127.0.0.1. BlazeHost uses an external MySQL server.Step 3 – Run Recipe
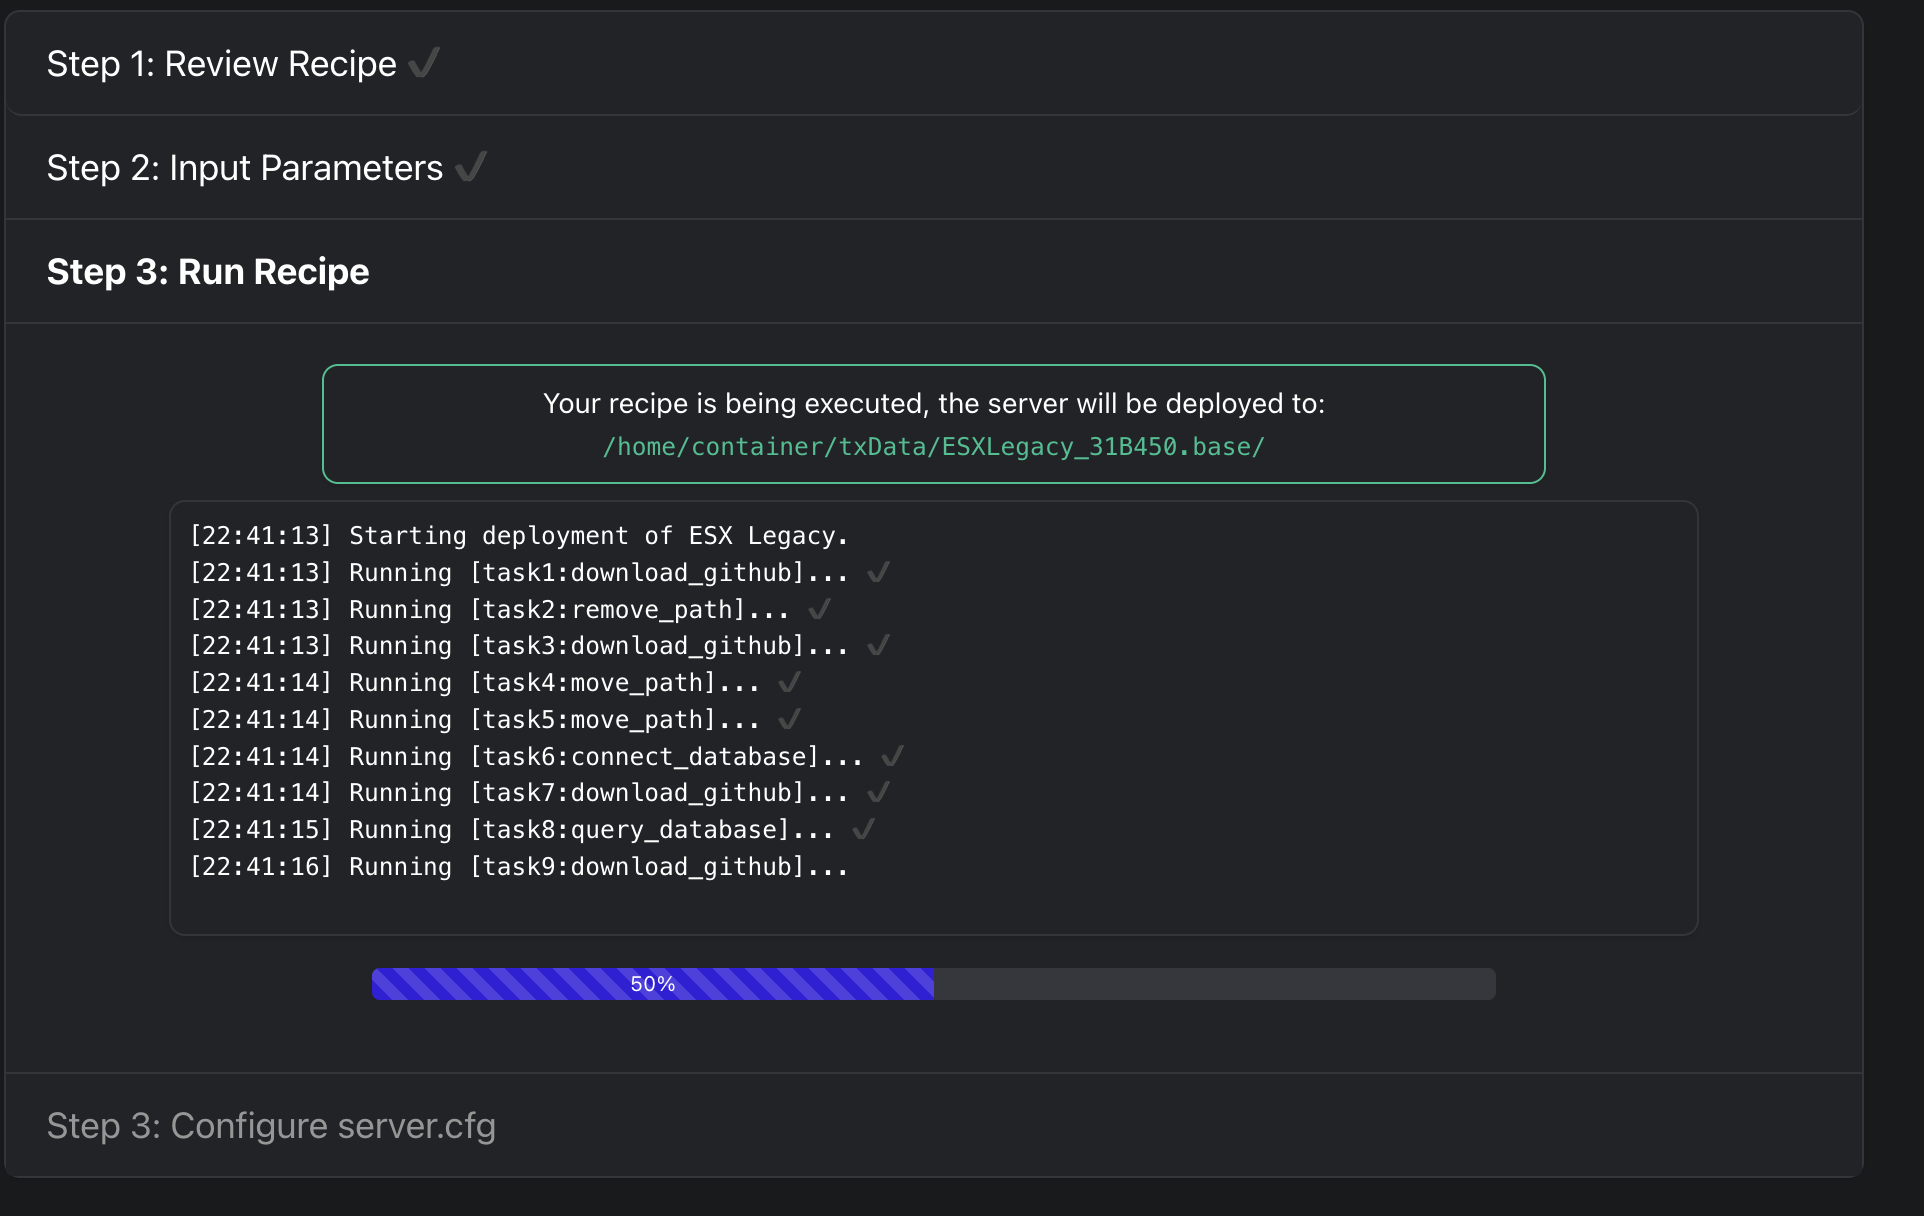
Click Run Recipe. txAdmin will automatically start downloading server files, installing the framework, and importing database tables. Watch the progress on the progress bar.
8server.cfg
After the deployment completes, txAdmin will generate a basic server.cfg. Find it in the Files tab or via txAdmin → Server Files. Check and fill in these items:
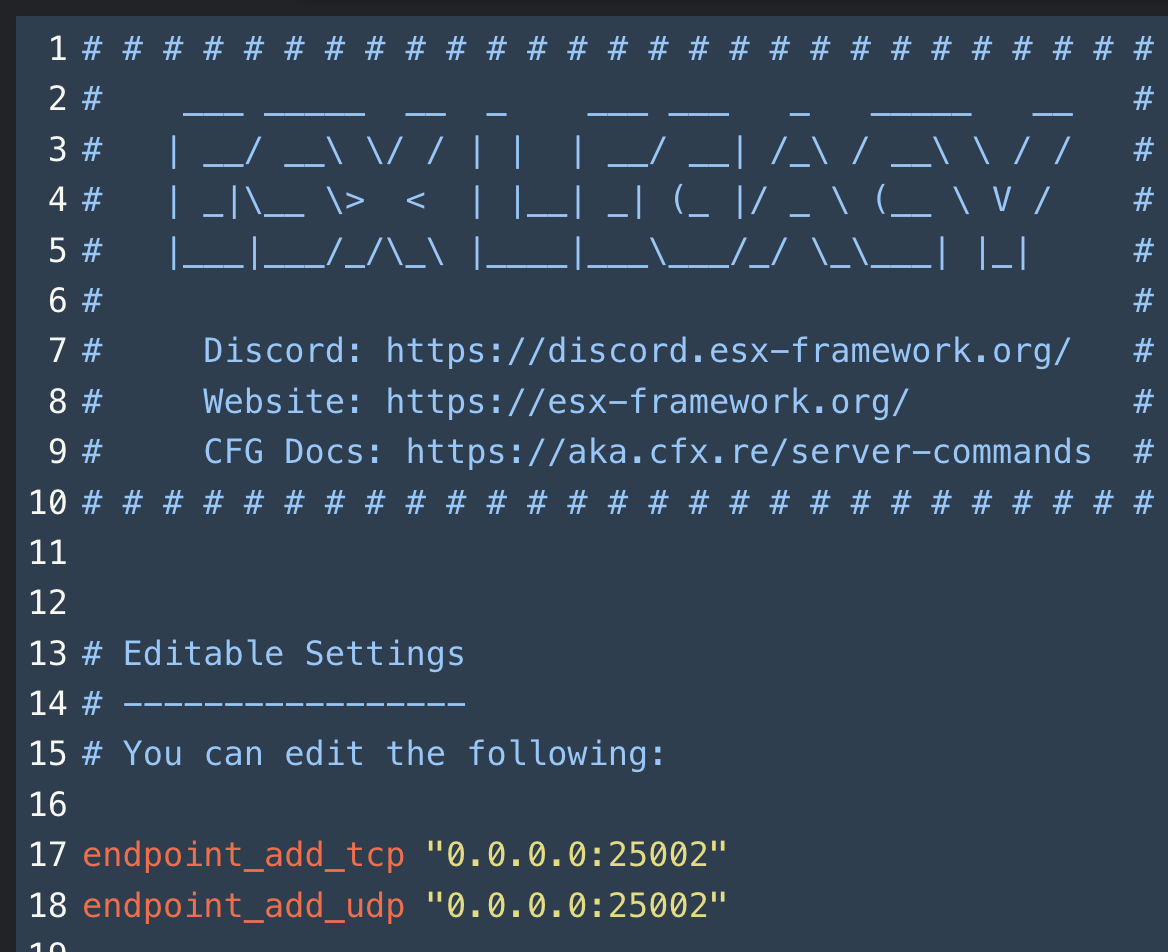
Key items in server.cfg:
# Endpointy – port musí souhlasit s primárním portem ze záložky Network
endpoint_add_tcp "0.0.0.0:25002"
endpoint_add_udp "0.0.0.0:25002"

# Název a max. počet hráčů
sv_hostname "Můj FiveM Server"
sv_maxclients 32

# Licenční klíč (Recipe Deployer ho vyplní automaticky)
sv_licenseKey "cfxk_VÁŠÍ_KLÍČ"

# Locale
sets locale "cs-CZ"9Starting the server and verification
In the txAdmin dashboard click the green Start Server button. After a successful start you'll see the server address:

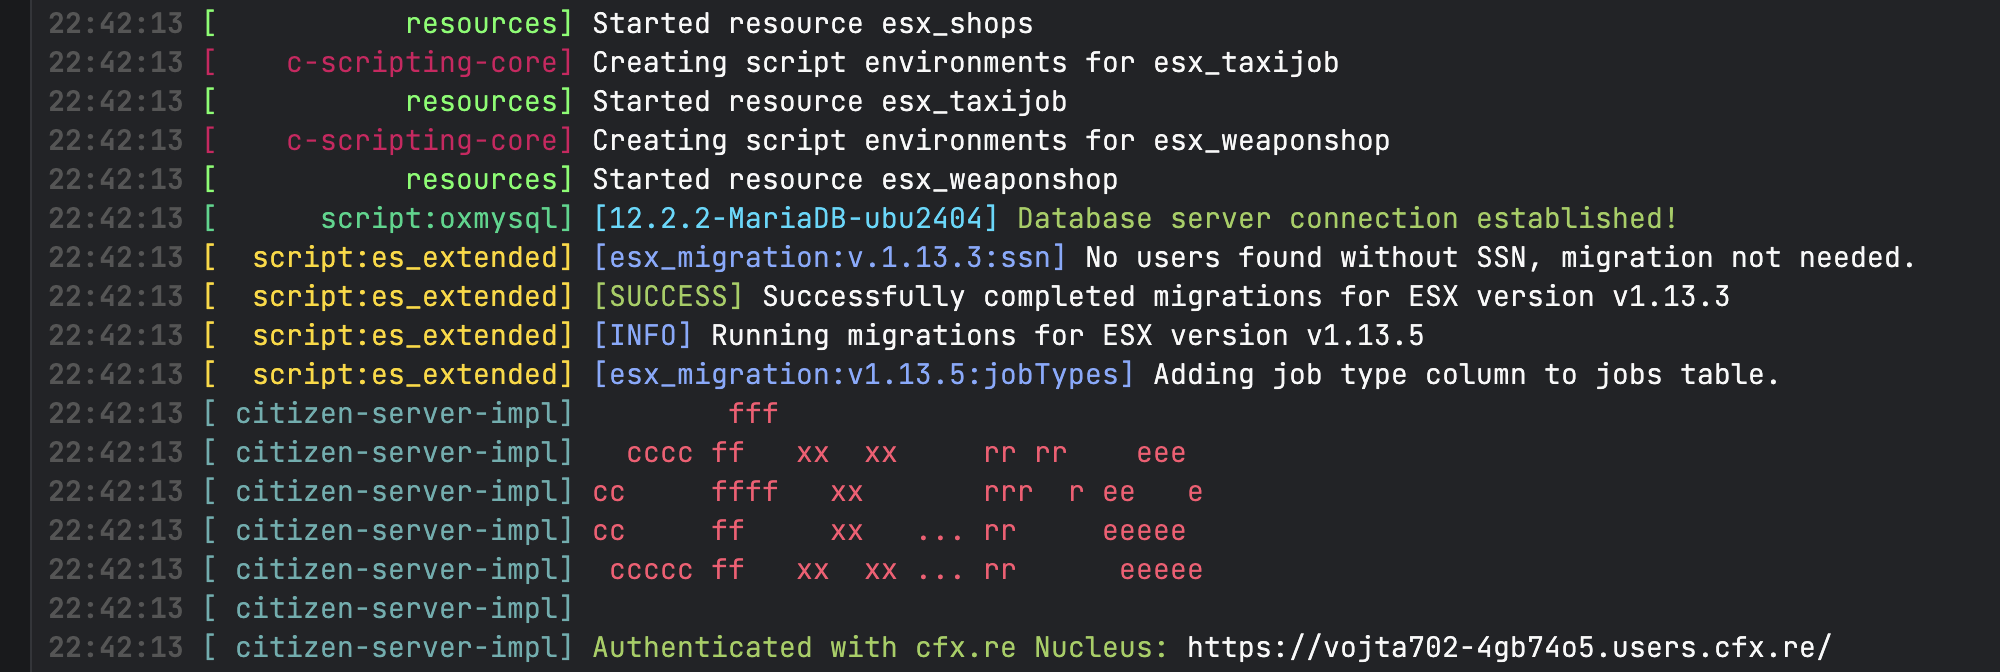
Watch the server console. A successful launch with a working database will show these lines (look especially for oxmysql and ESX migrations):
Connecting via FiveM client
- Open FiveM client and press F8
- Type:
connect node.blazehost.cz:25002(replace with address from Network tab) - Alternatively use Direct Connect in the FiveM main menu
Troubleshooting common issues
❌ ER_ACCESS_DENIED_ERROR / MySQL connection failed
Cause: Wrong credentials or hostname in the database connection.
Fix:
- Verify Database Host is mysql.blazehost.cz – not localhost or 127.0.0.1
- Go to the Databases tab in the panel and copy the credentials again via the details button
- Copy the password directly from the modal – don't type it manually, it may contain special characters
❌ Invalid license key / License key mismatch
Cause: The key is invalid or wasn't copied correctly.
Fix:
- Generate a new key on portal.cfx.re
- Copy the entire key – it starts with cfxk_ or similar prefix
- In the Recipe Deployer or server.cfg delete the old key and paste the new one
❌ Server starts but immediately crashes
Cause: Error in a resource or wrong port in server.cfg.
Fix:
- Find the first red error line in the txAdmin console
- Check that the port in endpoint_add_tcp/udp matches the primary port from the Network tab
- Temporarily disable custom resources in txAdmin → Resources to find which one causes the issue
❌ txAdmin page won't load
Cause: Server is still initializing or wrong port.
Fix:
- Wait 30–60 seconds and refresh the page
- Check the correct port in the Startup tab → TXADMIN PORT or the Network tab
- Make sure the server is running in the panel (green Status icon)
Still stuck?
Our support team is happy to help – we usually respond within 15 minutes.